
My first blog post is going to be about the mammoth task I have just started: my patchwork quilt! So, I've been learning how to do patchwork from my mum, the most crafty person I know. she made me a patch work bag a few years ago and only now I am appreciating how precise you have to be! So, here's a step by step guide in case you fancied having a go yourself:
1: Get yourself some material. This can be all the same colour schemes (I've chosen blue) or completely random. It's up to you. Get a good two to three metres if you're planning on doing a double bed sized quilt as you'll need to make a lot of squares of material.
NB: I'm planning on doing a double sized quilt and am going to do approximately 50 of each finished pattern (2 patterns) so 100 squares in total. This leaves room for 'sashing' which I will have to describe when I've done as I'm an amateur quilt maker!
2: Get a large cutting board (see the photos below) and a rotary craft cutting blade- like this one: http://www.pelennapatchworks.co.uk/rotary-cutters-blades-and-knives-39-c.asp

3: Cut yourself a template for the first square out of cardboard (I made mine about 8cm but you can make it bigger) and start cutting some squares out from your template. Cut the squares in two different types of material as we're going to sew them together.
4: Sorry, haven't taken a photo of this step- so I made a paint example instead!. Place the two different patterned 8 x 8 cm squares together, with the best/front side of the fabric facing one another. Sew around the squares so they are totally sewn together. It is best to do one side of the square at a time (don't worry about knotting it off) so you don't cut through the thread and unravel the whole thing.

Using a ruler and either a dress makers pencil or chalk, mark a cross on the side of the fabric you don't want to be in the middle, for example the light blue in this case.
Carefully cut with small scissors where you have drawn.

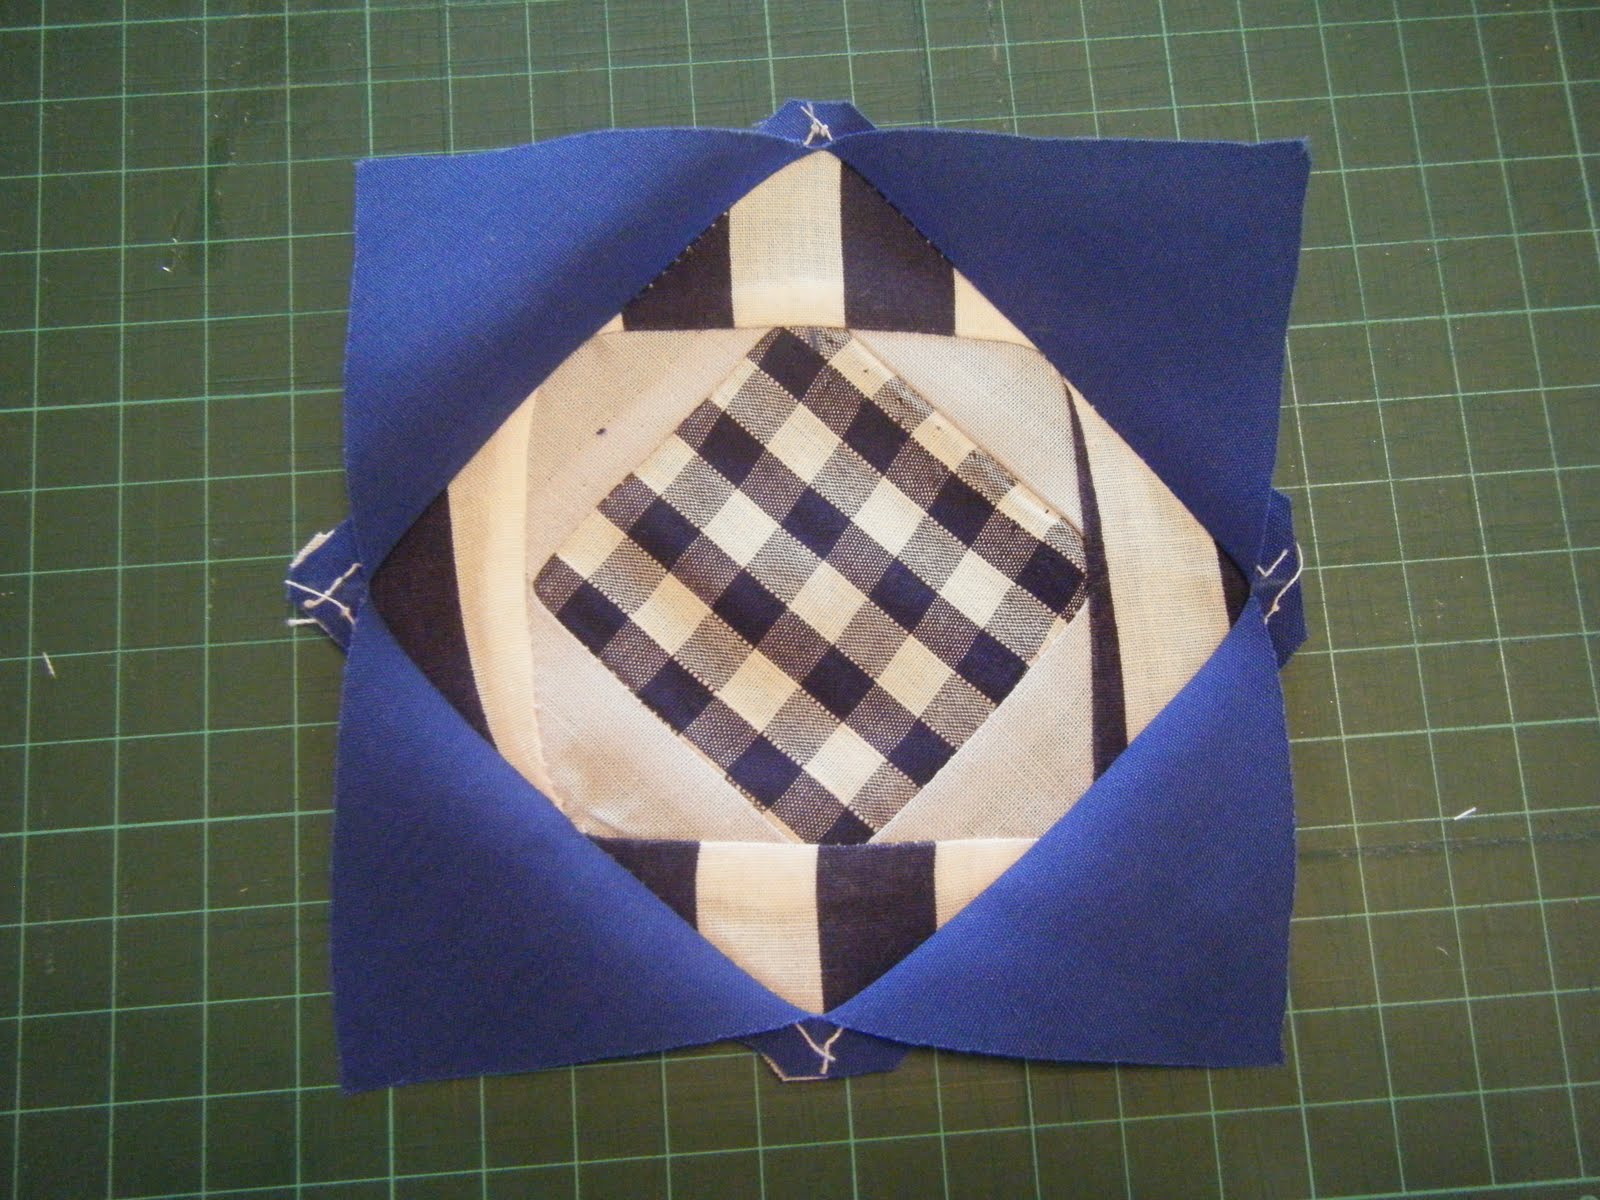
Flatten the triangles out so you have similar to this.-->
Now iron this piece so it is nice and flat for you to work on.
5: Measure this square (the one with the arrow pointing at it) and make your next template out of cardboard.
6: Now cut your the next colour square you would like out from your new template. Sew this new square and your started patchwork together:

7: Repeat the step of drawing on the cross and cutting along the line of the cross as above in step 4. Open it up and iron it out again.
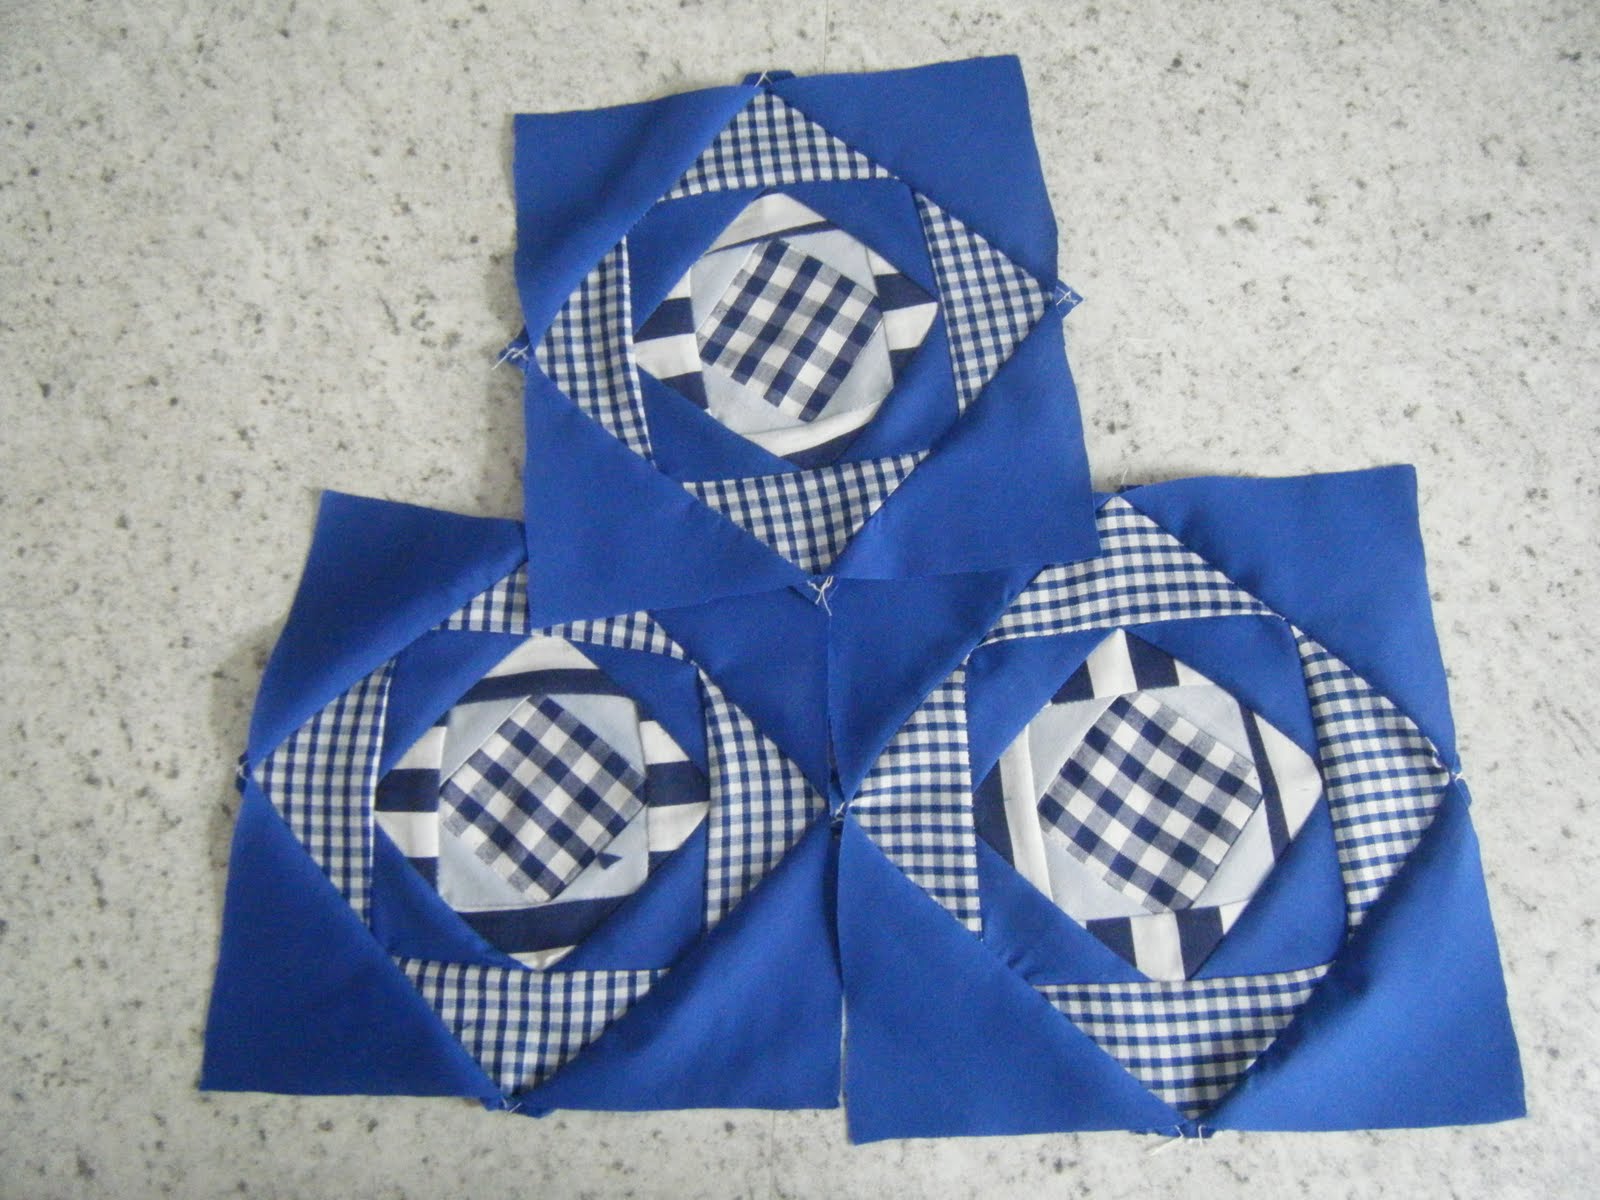
The different squares of material can be seen below:

8: Continue to make templates from the ever growing patch work and draw on crosses, cut the crosses and open out. Then iron. here's an example of the larger sqaures being ironed out. This also shows the amount of hem you should be leaving (quite small!).

9: Continue the above steps a few times with the same fabric. Sit back and be proud of the (almost!) identical nature of the patchwork squares.
Right that's enough for now, once I've made 50 more of these I'll get to the sashing and quilting.
If there's anything you'd like to know, leave me a comment and I'll try to answer your question (this is my first patchwork though!).